![]() Planes...
Planes...
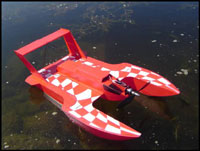
Red's Miss Hangar One
Is it a bird? Is it a plane? No, it's Red's Miss Hangar One!
It's a multipurpose craft that will go on water, grass, asphalt & to top it all off - the air! We first saw the video's a couple of months ago and were instantly taken by it. We had never built with foam before and Josh was keen on a boat, so we thought this would be a great Easter project to start.
There's quite a few different designs out there on the net - but after looking around I decided on Red's 'Miss Hangar One'. This had good reviews, a full colour step by step manual and the plans looked good. There were enough tabs for alignment - but not too many to cut out! There is a great review on the ezone with a video at that finally sold me on this plan.
Here's a couple of pictures of the original...
Basically, it's built from 3mm Depron foam, with some 6mm sections and some light ply where additional strength is needed.
The final specs look something like this...
- Length: 29" (~72cm)
- Width: 18.5" (~45cm)
- Covering: paint! (Josh thinks green and gold are likely)At this stage we'll probably start with the following setup...
- Motor: 350sp
- Gearbox: 4:1
- Prop: APC 8x6E
- Battery: 7cell 600mah NiMH
- Weight: ~? grams
This gear is all spares from a Parkzone Decathlon that I have and should be ok while we're getting the hang of how it flies (on the ground!). Eventually we'll probably replace this with lighter and more powerful gear to get it airborne...For a start we'll try it mainly as a boat on grass and water until eventually we experiment with getting it in the air. Josh is looking forward to learning to control it!
I was really impressed with how the Depron foam cut and glued. It was easy to slice and shape with a sharp hobby knife and the glue held it in place fairly quickly - although it took overnight to cure to full strength. Scotch tape stuck well to hold the pieces in place while the parts were drying and came away well when finished.
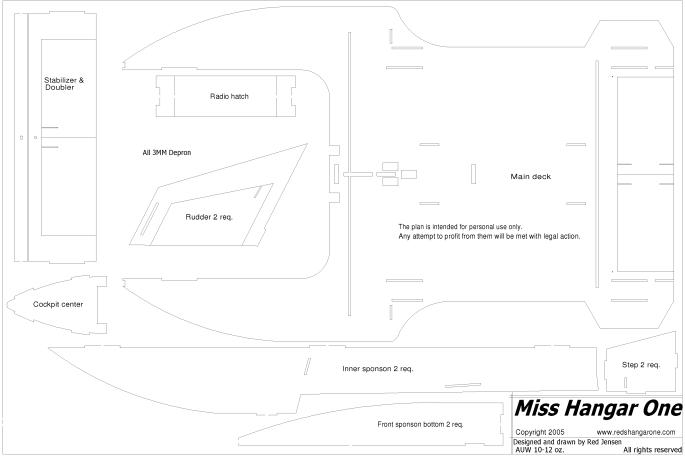
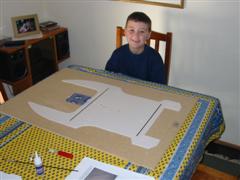
It took about 3 hours to cut out all the pieces and then another 4 hours to put all the basic foam sections together. The manual was really good and it all went together with only minor trimming required.The original plan can be found on Red's site in pdf format. I converted this to bmp, printed it on A3 and then enlarged it 126% on the photocopier to get to the correct size. The following is the first of two pages...
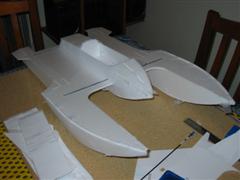
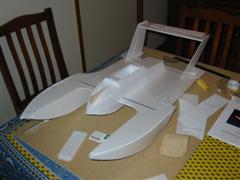
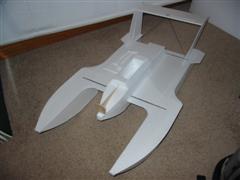
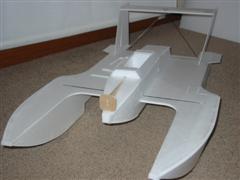
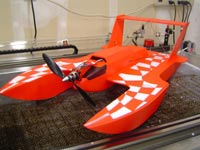
The following photo's show the current build sequence for the model. We didn't take photo's at each stage as it went together too quickly!
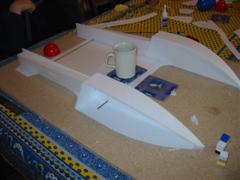
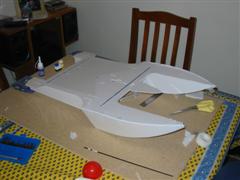
All the Depron parts cut Base on the building board with 2 3mm Carbon rods fitted - and Josh in the background! On the board. Starting to add the sponsons. Bottom completed and turned over for the first time. Adding the canopy. ...from the front. Now with the tail added. ...and another angle. Ready for carving, painting and electronics now! Added the motor mount, tail braces and trimmed/sanded back the excess foam. Up close. Last Updated: 28th April, 2006
Previous - P-51 Python Next - Speed 400 Aerobatic Back to 'Planes Index'